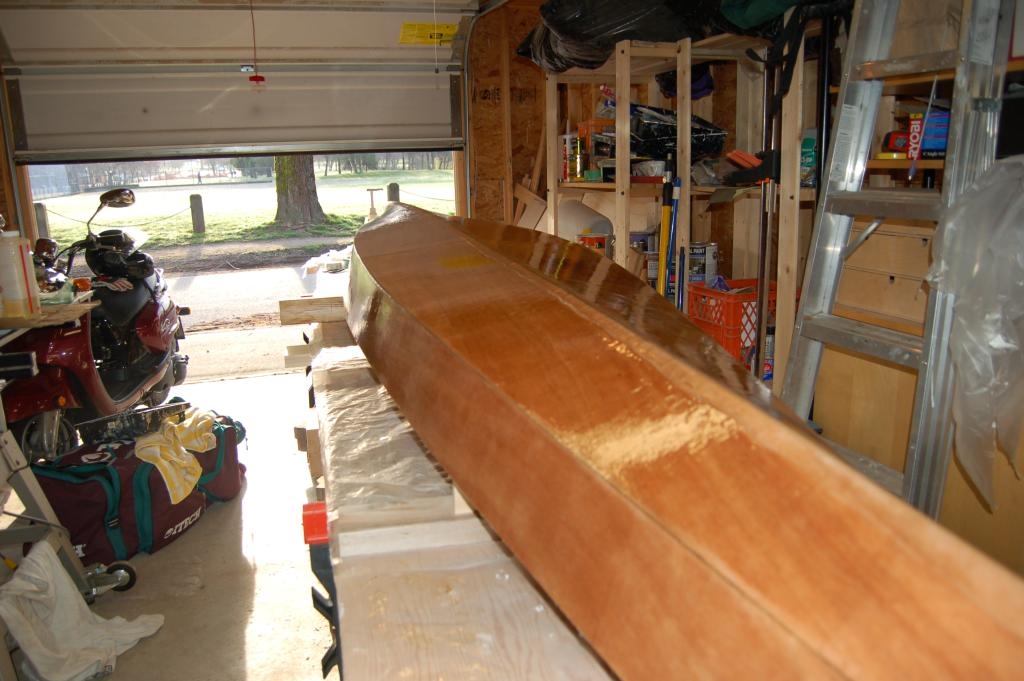
Laying down the glass
It’s been a busy week with the kayak. I’ve managed to do the saturation coat, lay the fibreglass and do the first fill coat. I’ll likely do some scraping on the fill coat and complete the 2nd fill coat tonight.
Overall this work went fairly smooth, although there were some stressful moments.
The saturation coat went very fast and quick. I don’t know why someone would skip this step unless they were very busy or experienced. If you have a spare day (and it seems most kayak builders do), you might as well do this step. I was making batches sizes of about 6oz, and the boat took 4 batches. There’s not much more to the saturation coat than that.
Doing the glassing was another story. In the end everything was fine, and in hindsight it wasn’t very hard. Being the first time that I’ve done this, it was stressful at the time. Laying down the cloth was easy. I didn’t get all the wrinkles out, but that didn’t seem to matter once the cloth wets out. The first batch I put on was fine, and then the troubles started. I went to mix my 2nd batch and my bottles wouldn’t dispense any more epoxy. The plunger didn’t go deep enough into the bottle… oh oh. So I quickly swapped the plungers into new bottles and made a batch. After the second batch I wanted to swap rollers but I couldn’t pull the roller off. Now I’m really starting to get worried, wondering how much time I had before I needed to roll epoxy onto the areas adjacent to where I had already worked. I ended up getting epoxy all over my gloves and roller frame. I swapped gloves, but epoxy transferred from the frame to new gloves and then onto my squeege. So now everything has epoxy on it, which isn’t fun. A couple of batches later things settled down. I ended up putting maybe 8 batches on to the glass and used 6 rollers.
Here are my tips for this step:
1. you don’t need to use 6 rollers. I would use at least 2 rollers though, as I noticed trapped epoxy stays on the roller and gets quite aerated.
2. pouring epoxy directly onto the boat then spreading with the squeege works well. However, with the tern there is a hard chine which makes it very hard to spread the epoxy across (from the keel panel to the side panel). Therefore I don’t think this method is suitable for the tern.
3. if you can roll all of your epoxy onto the boat in about 30min then it will be better to leave all of the squeege work until the end.
4. set aside a little area for removing foam rollers from the rolling frame. I used a knife to cut the foam in half for easy removal.
5. put an adequate amount of epoxy onto the cloth and let it soak as you spread on more epoxy. Then you can go back and roll all of the epoxy further into the cloth.
6. if (when) you get runs and sags in your fill coats, scrape them off as soon as you can. it will be lot easier to scrape green epoxy than sanding cured epoxy. I was going to wait until I had finished all of my fills before scraping but then it was pointed out to me that the underlying runs will be hard by then, and difficult to remove.